
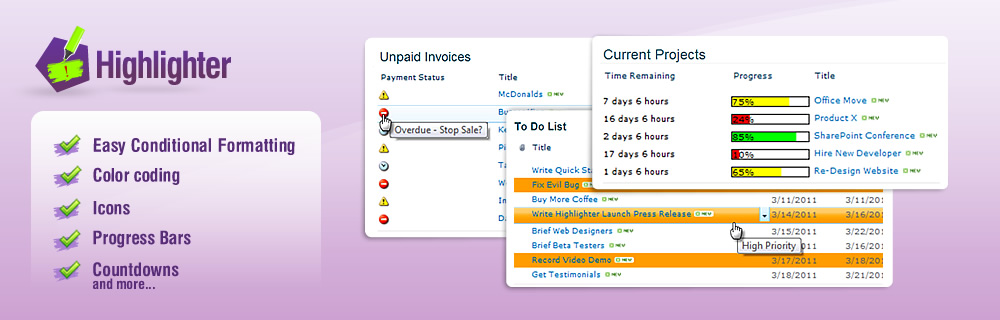


Highlight High Priority Help Desk Tickets
If you are running a busy help desk or customer service centre it would be easy to miss the high priority tickets in the mass of items coming through.

Here's how:
1. Create your list, for this example we are going to use an Issue Tracking List, as this is pretty much ideally set up for help desk tickets or customer service issues - though remember, Highlighter will work on any SharePoint list or Library.

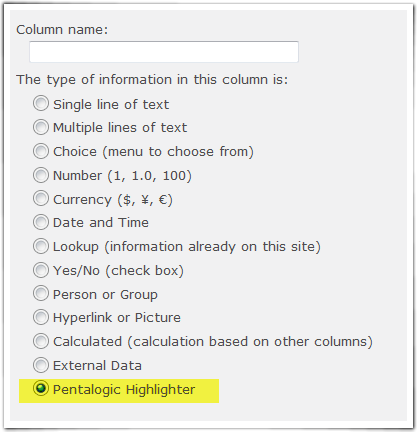
2. Open the List Settings, and click Create column
3. Choose "Pentalogic Highlighter" as the column type.
4. Now format the column. For this example we are going to choose Highlighting
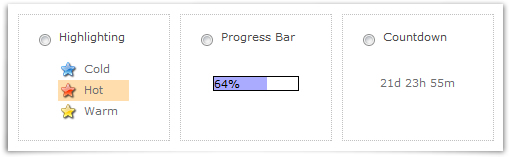
5. Now to set up how we want things to be displayed. We can go for icons, row or cell highlighting; in this case we are going for Row highlighting to make sure things really stand out.
We're going to base the highlighting on the Priority column.

6. Now on to the rules. It's here that you get to format exactly how and when you want your Highlighting to appear.
If you click Auto-create the default highlighting rules will be created.

So if we leave things like this we are going to get our High Priority items highlighted in red, which is what we want, but also normal in yellow and low priority in green: It's going to turn in to a bit of an amazing Technicolor nightmare list I think! So let's edit these and calm things down a bit.
7. Delete the rules applying to Normal and Low priority items, by clicking the red minus to the left of the rules we don't want.
Then to change the color, simply by click on the color block in the rule and choose a better color from the color picker.

Here's the result:
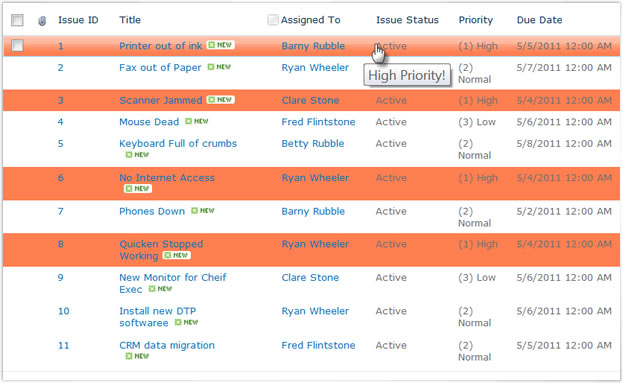
It's now easy to pick out the High Priority list items which need special attention, at a glance.

