

Help Desk Despatcher
Find your most relevant information fast by applying FilterPoint Web Part to SharePoint lists.
In this example we have used FilterPoint on a list of Help Desk tickets.
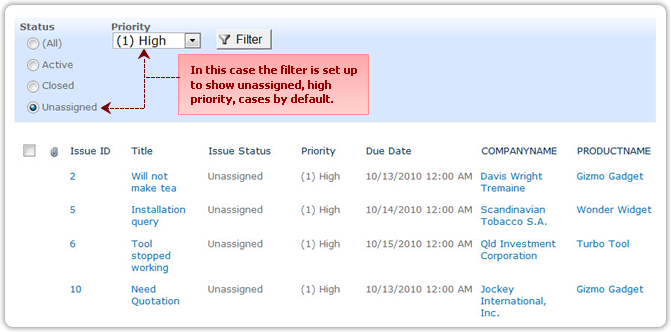
Setting default values allows the despatcher to see their most relevant information at a glance. In this case the filter is set up to show unassigned, high priority cases by default:
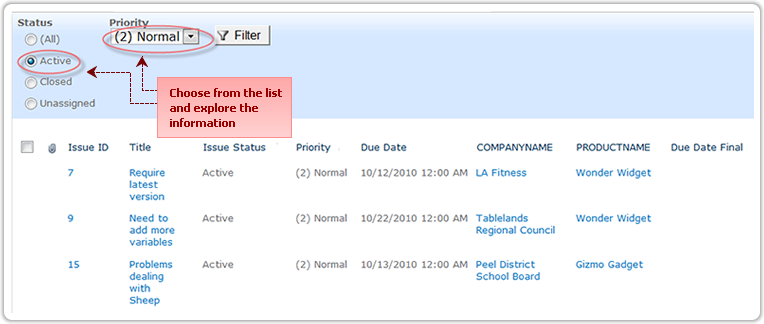
Explore other information in just a click:
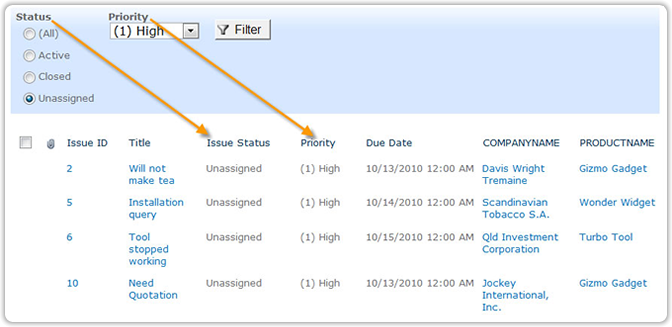
Filter on multiple list fields from one filter Web Part - no need to add a new filter web part for each filter you wish to apply:
Setting up FilterPoint for Help Desk Filtering is easy:
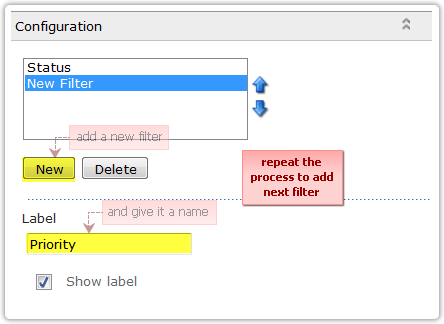
Then, open the configuration panel, add a new filter and give it a name, in this case "Status":

Choose the filter style, in this case, radio buttons:

Get your filter values, by choosing the list, and field they are to come from:

Set your default value by typing it in - careful to get the spelling and spacing exactly as they are in the list:

Apply your changes:
and repeat the process to add your next filter:
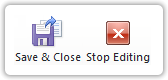
Save your changes on in the configuration panel, and on the SharePoint page (SharePoiint 2010)

And you're ready to go!